Designing a pages system with TypeDCMS
The most basic content type for most web projects is pages. In this guide we'll design a simple pages system using TypeDCMS blueprints.
Photo by Visual Design
The most basic content type for most web projects is pages. In this guide we'll design a simple pages system using TypeDCMS blueprints. To follow this guide you'll need a TypeDCMS account and a project where you have a team architect or administrator role. Let's get started!
Start with a Blueprint
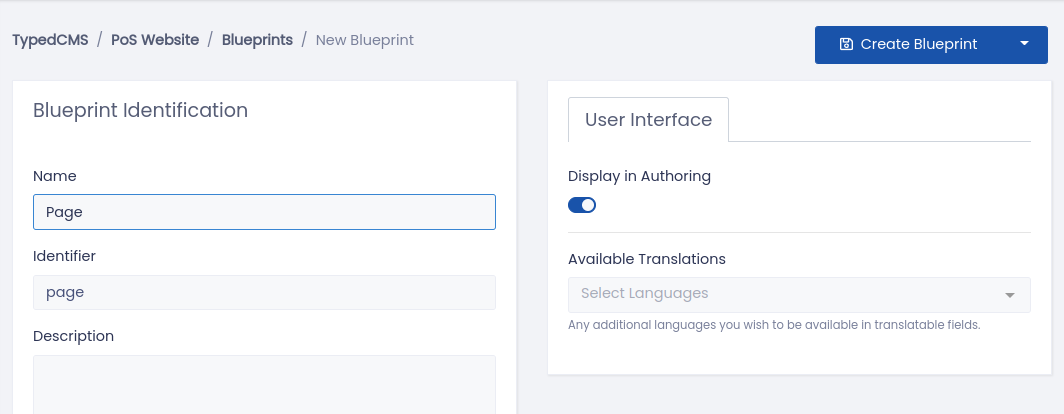
The first step to creating any content type in TypeDCMS is a Blueprint. A blueprint is exactly what it sounds like, a model for your new content. From your projects sidebar, expand Architecture, click Blueprints and then click New Blueprint. Let's name our new blueprint ‘Page’ and then click Create Blueprint.
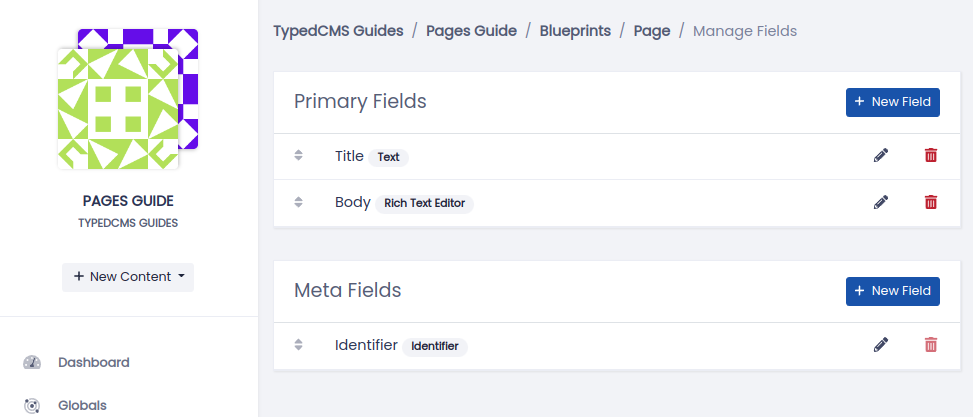
Once created, you will be shown your new blueprint's fields. These represent the data that makes up a ‘Page’. By default a new blueprint will include a unique identifier field, a title field and a body field. The ‘Identifier’ is already preconfigured to be autogenerated from the ‘Title’.
Add Some Fields
This is probably enough for the most basic of pages systems, but we'll add a little extra. Our pages will have a hero image and breadcrumbs. To achieve this we'll need an image field for our hero and we'll use a relationship field to set the parent page for our breadcrumbs.
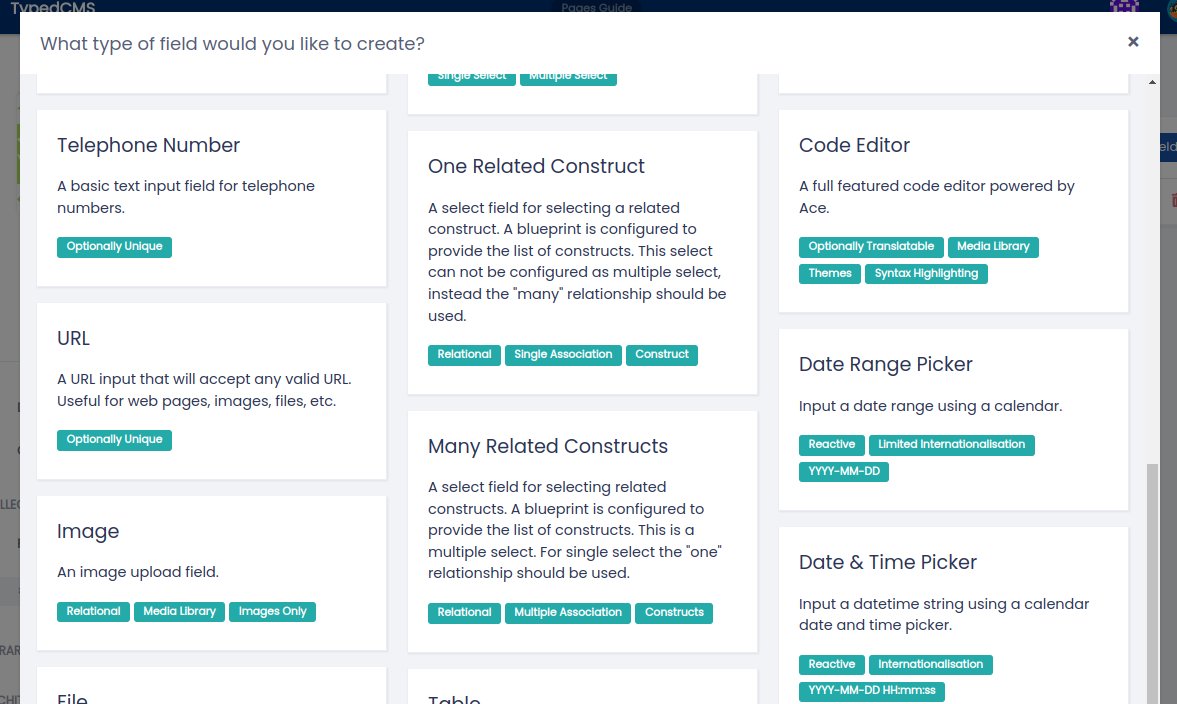
Let's start with the hero image. Click New Field and select Image from the list of field types presented.
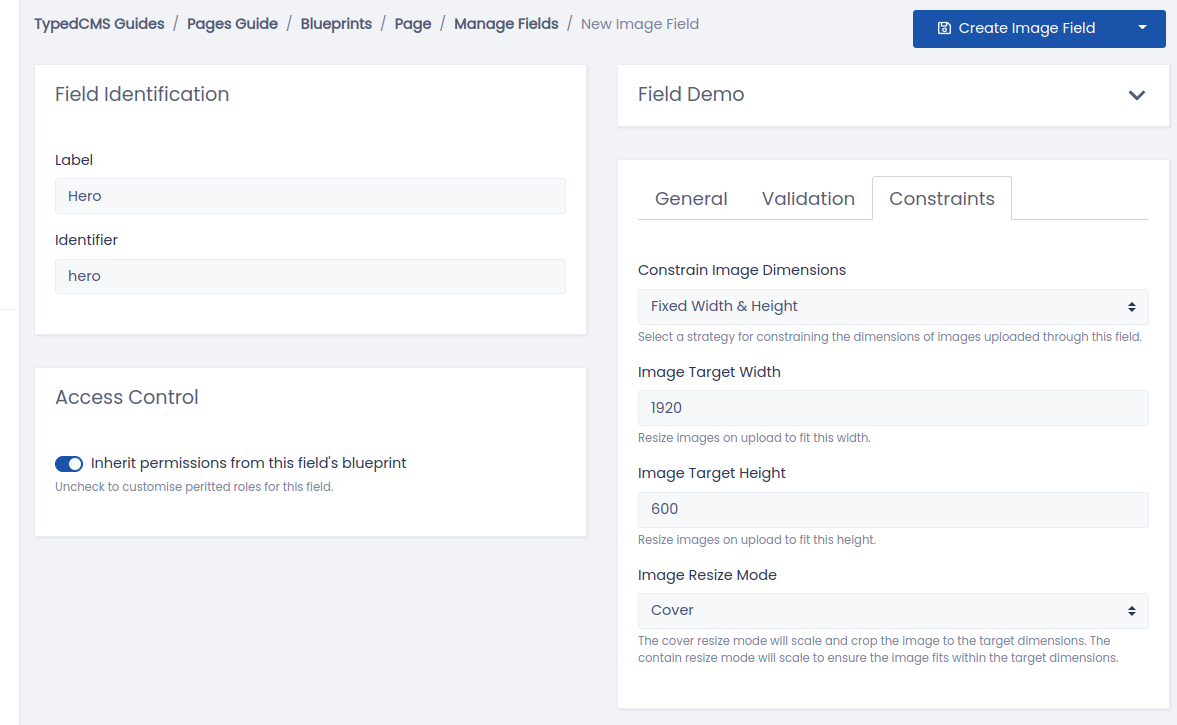
We'll call this field ‘Hero’ and in the Validation tab, set it as a Required Field. We want our hero image to be constrained to a certain size, so we'll configure this in the Constraints tab. From the Constrain Image Dimensions drop-down select ‘Fixed Width & Height’. You'll now see three more drop-downs, target width, target height and a resize mode. For our hero image we'll use ‘1920’, ‘600’ and ‘Cover’ for a full-width, short hero with auto-cropping. Finish by clicking Create Image Field.
Next let's create a relationship field. Same as before, Click New Field, but this time select One Related Constructs from the list of field types presented. TypeDCMS uses the term Constructs to describe things constructed from blueprints, in other words your content.
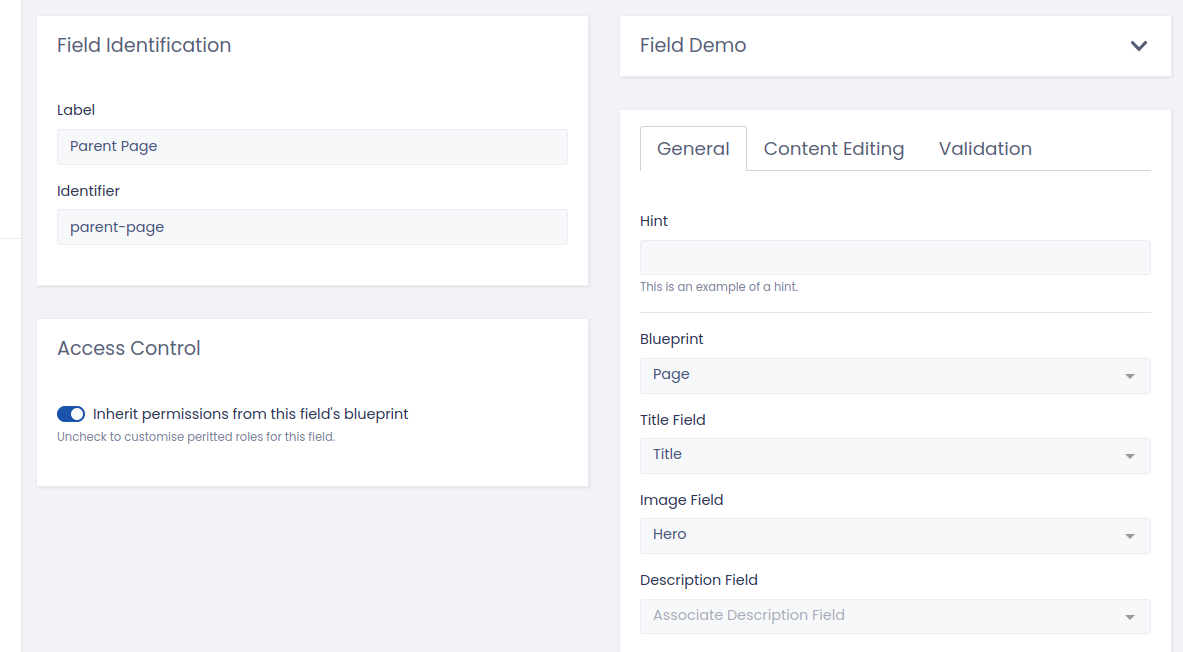
We'll call this field ‘Parent Page’ and in the set the Blueprint field to associate our ‘Page’ blueprint. We can now select a Title field and an Image field. We'll set these to ‘Title’ and ‘Hero’ respectively. The content of these fields will be shown when associating a parent page - we'll see an example of this later. Click Create One Related Construct Field to finish.
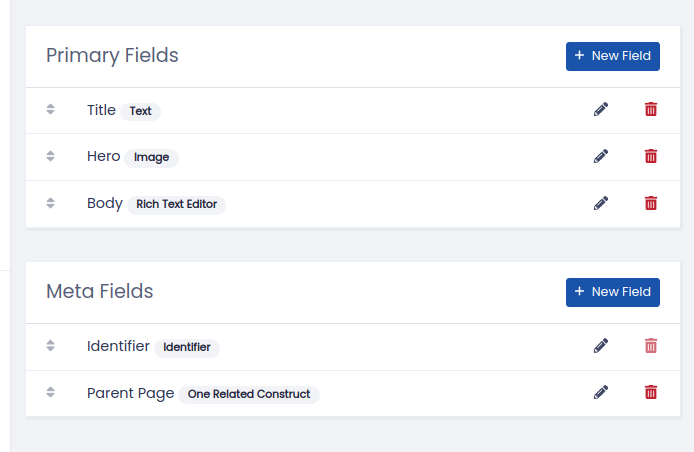
At this point you may want to rearrange your fields into your desired order.
Create a Page
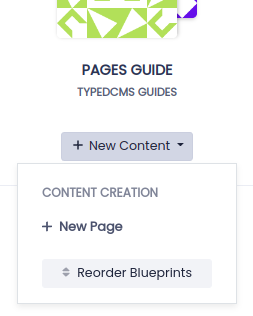
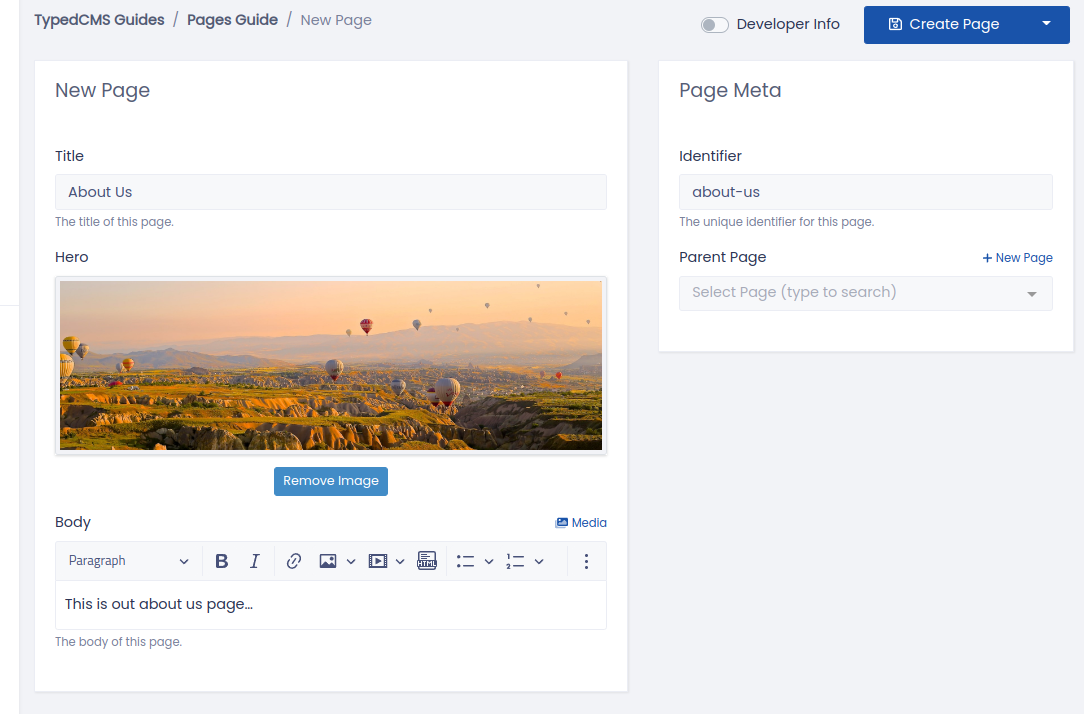
Now that we have a blueprint, we can create our first page. In the project sidebar, Click New Content and you now have a New Page option - click it!
We'll call this new page ‘About Us’ and throw in some content. Once you're done click Create Page.
A Collection of Pages
Having saved the page you will be returned to a list containing only your new ‘About Us’ page. This is your Default Collection for the ‘Page’ blueprint; it was created automatically for you.
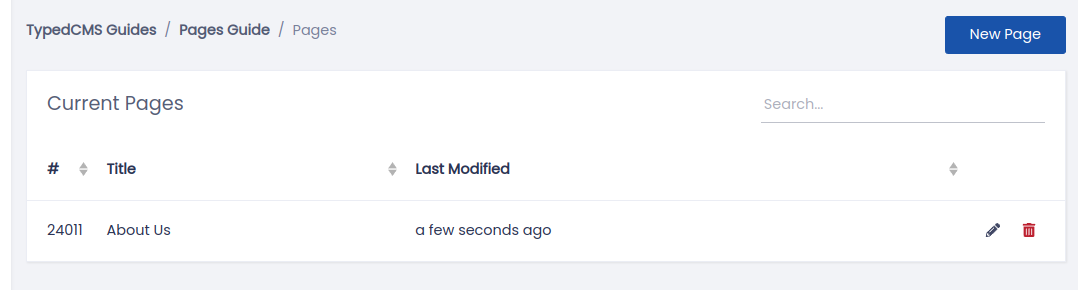
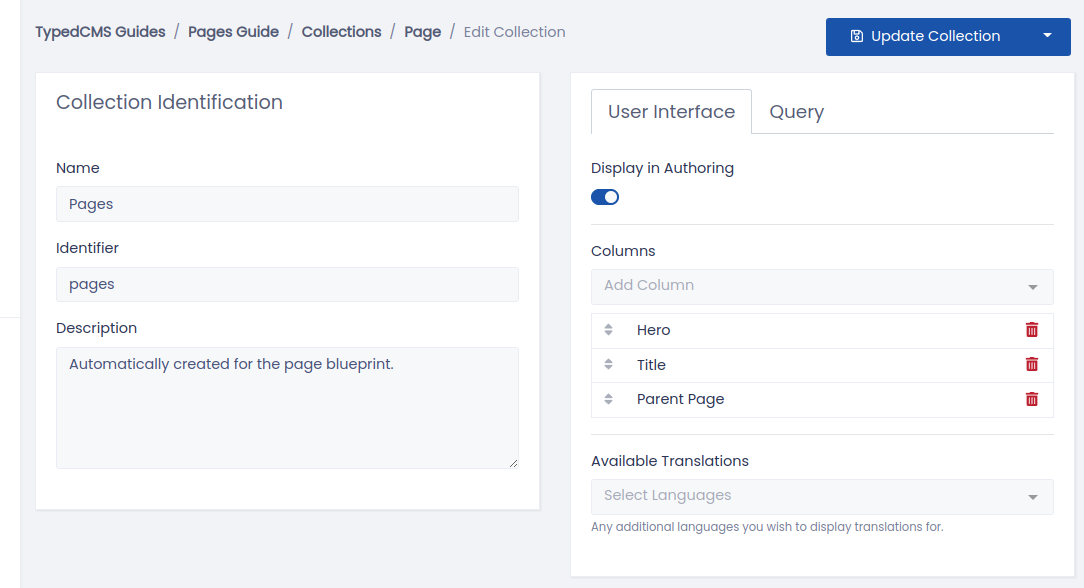
It's a bit bland though, so let's make it a bit fancier. In the project sidebar, head to Architecture → Collections and click the pencil next to your ‘Pages’ collection. As you can see, from here you can add columns and customise sorting and filtering options.
Let's add some more columns! From the Columns drop-down we'll add our ‘Hero’ and ‘Parent Page’ fields. Finally click Update Collection to save these changes.
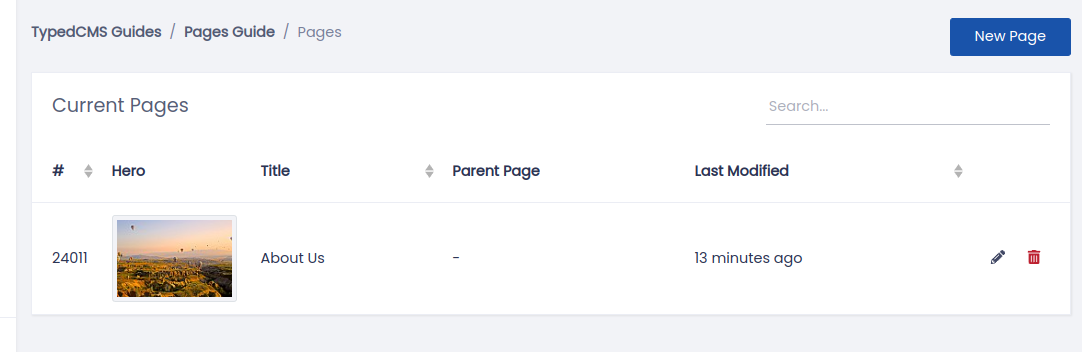
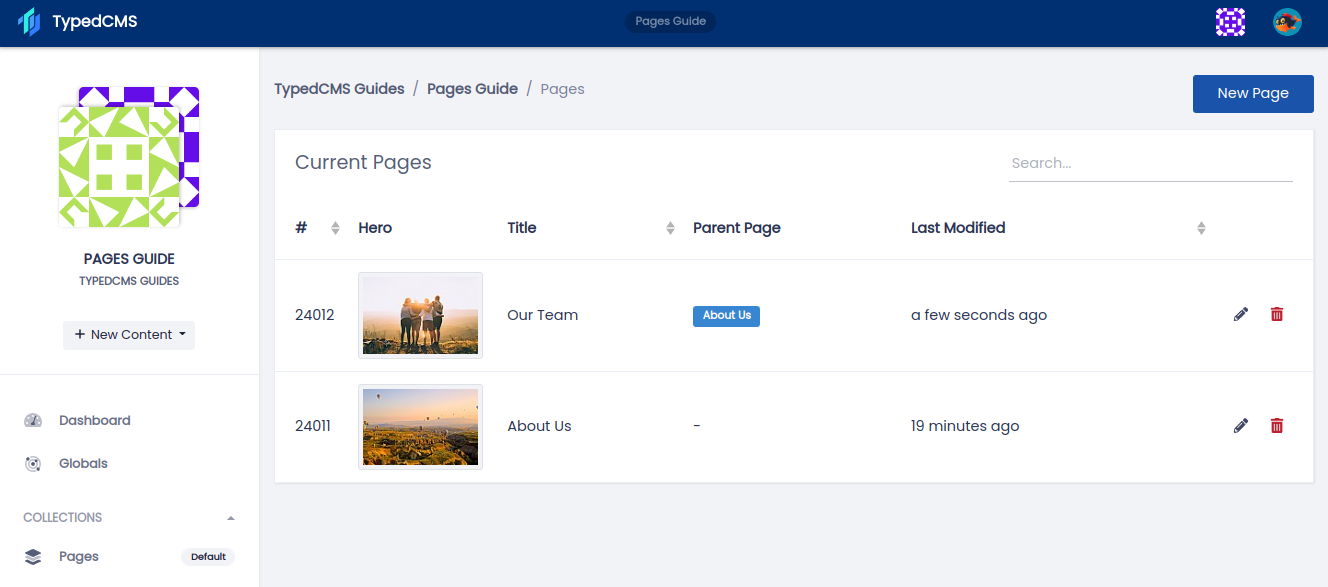
To return to your ‘Pages’ collection, from the project sidebar navigate through Collections → Pages. You'll now be presented with a much nicer list of pages.
Form a Relationship
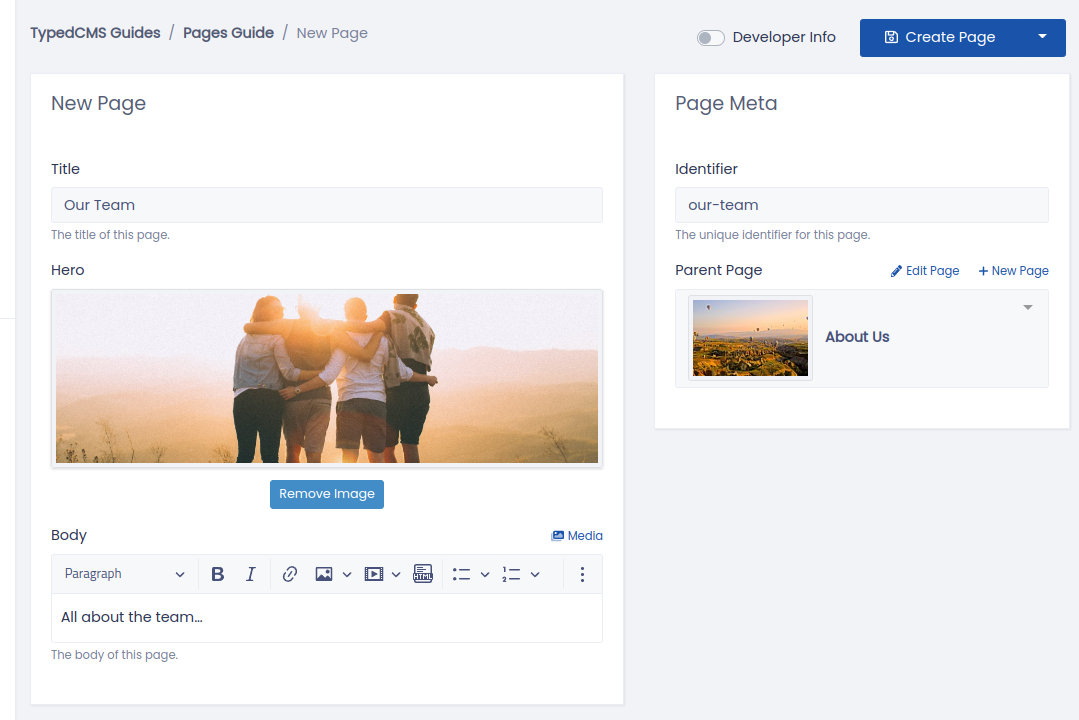
That's pretty much the basics of pages, but, before we finish up, let's create a relational page. Same a before, click New Page to get started. We'll call this page ‘Our Team’, add some content and set the Parent Page to ‘About Us’. Click Create Page.
Done! A simple relational pages system. Using these basic building blocks, you are now free to imagine even more awesome blueprints.